Showing posts with label Recipes. Show all posts

Monday, February 28, 2011

Exotic Eats: Green Curry (Indian)


There's no reason why a Jew shouldn't be good at cooking Indian food. I mean, after all, our ethnicities are very, very similar. We both have lots of doctors and accountants. We're both cheap (or so most of my Indian friends tell me). We both love unleavened bread (Matzo and Chapati). We even have great sauces--tahini and raita. So yes, our ethnicities definitely travel along the same roads...well, except for our actual food.

Indian food is probably my favorite ethnic food out there--exotic spices, incredible flavors and plenty of incredible accompaniments make it an absolute joy to eat. Today's dish--green curry--is truly a superb one. Since I'm not Indian, I had to look elsewhere for a recipe. Enter NuM NuM, an awesome blog with even better recipes. It had everything I was looking for: mint, cilantro, ginger, and a bevy of spices to go with it. I'll copy/paste the recipe below...I used more Greek yogurt than was advised, and it gave the sauce a creamier texture. Regardless, it was delicious. I served it over rice and with a side of chapati (Naan's lighter, wheatier brother).

(Note: For some of the ingredients (like the garam masala), you may have to go to an Indian grocery store. I also usually get my mint from them too, since they sell it in larger quantities than a grocery store)

Green Chicken Curry
- 1 bunch cilantro leaves, coarsely chopped, 1 1/2 cups
- 1 bunch fresh mint, leaves, coarsely chopped, 1 1/2 cups
- 1 red onion, chopped
- 6 cloves garlic
- 1 1/2-inch piece ginger, peeled and coarsely chopped
- Kosher salt and freshly ground black pepper
- 1/4 cup chicken broth (low sodium), plus 1 1/4 cups
- 2 tablespoons olive oil
- 2 shallots, thinly sliced
- 2 teaspoons ground cumin
- 1 teaspoon ground coriander
- 1 teaspoon garam masala
- 1/2 teaspoon ground turmeric
- 1/4 to 1/2 teaspoon cayenne pepper
- 3 boneless, skinless chicken breasts (1 1/2 lb)
- 1/4 cup Chobani Greek plain fat free yogurt
- Cooked basmati rice or warm naan bread, for serving

  1. Add the cilantro, mint, red onion, garlic, ginger, and salt, and pepper, to taste, to a food processor or blender. Puree on high until smooth. With the processor running, add about 1/4 cup broth, and blend until the mixture is the consistency of a thick paste, a.k.a. “masala”. Set aside.
  2. In a large pot or deep skillet heat the olive oil over medium heat until shimmering. Add the shallot and cook, stirring often, until golden brown.
  3. Add the spices and cook for 30 seconds. Pour the masala mixture into skillet and cook, stirring often until it deepens in color and aroma. You’ll know it’s ready when it looks shiny, little droplets of oil will appear on the surface, and the masala will hold together as a cohesive mass.
  4. Add the chicken, coating every piece in the masala and stirring often. Continue to cook for 5 minutes, so that the masala really adheres to the chicken. Add about 1 1/4 cups broth, just enough to cover the chicken. Bring to a boil, and then reduce the heat and simmer, uncovered, until the chicken is tender and sauce has thickened slightly, about 20 to 25 minutes.
  5. Remove the pan from heat and stir in the yogurt. Taste and adjust seasonings, if needed. Transfer the mixture to a serving dish and serve over rice or with warm naan (or chapati) bread.


Monday, February 21, 2011

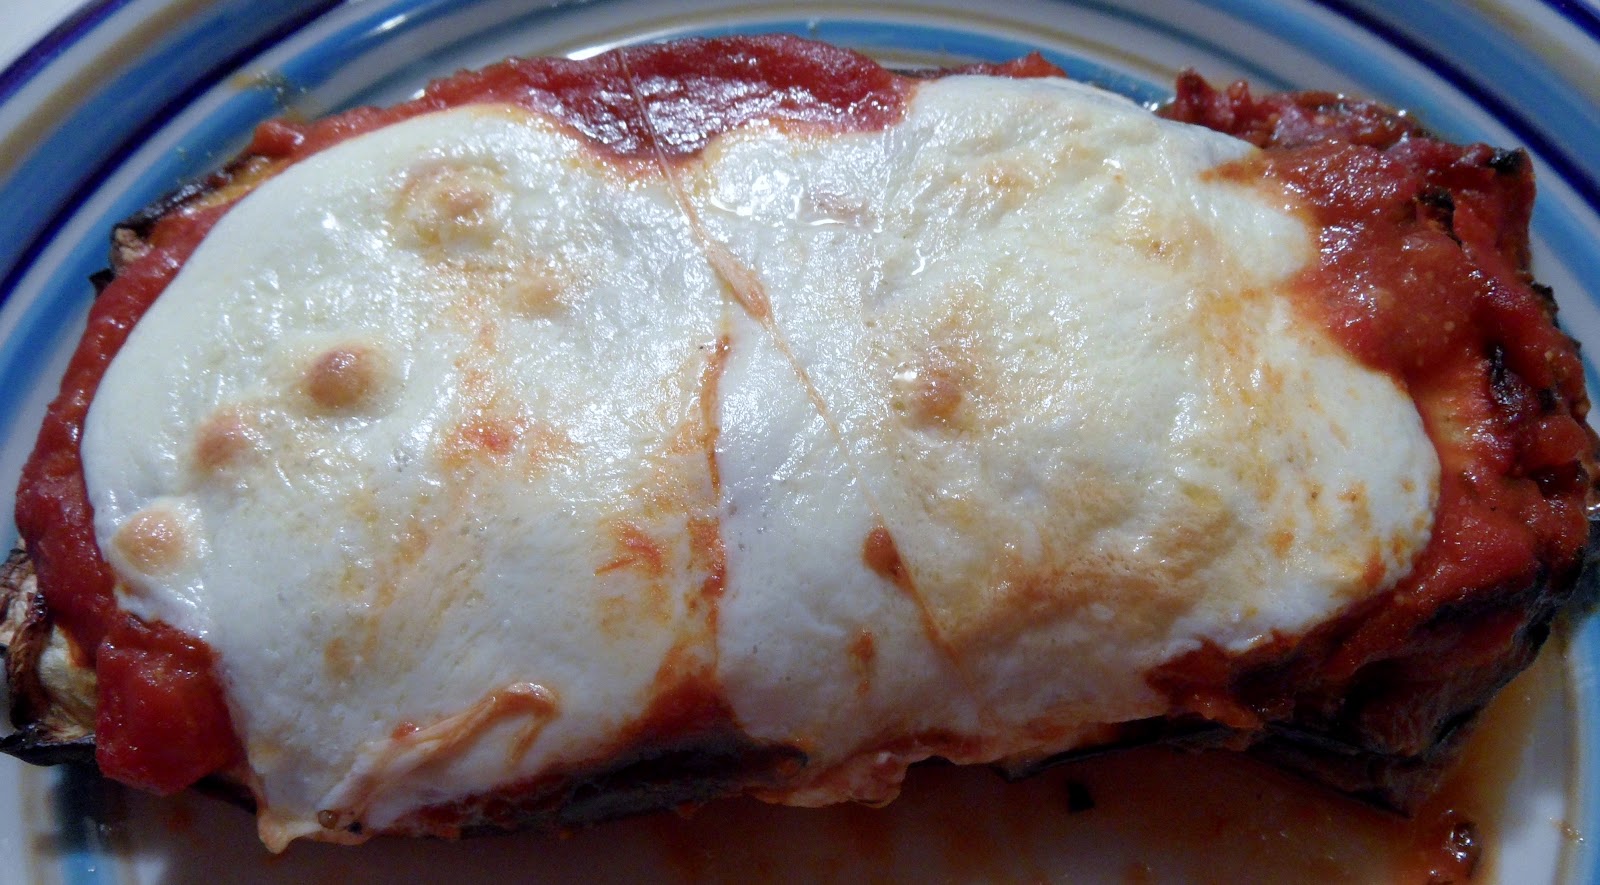
Mmmm...[Healthy] Eggplant Parm!


I remember the first time I ordered eggplant parmesan in a restaurant. The waiter brought it out, and I was able to look at it in all it's glory--a mound of breaded and fried eggplant, smothered with sauce and topped with a boatload of melted cheese. Believe me, it was love at first bite!


Eggplant is an incredibly healthy fruit (or is it a vegetable?!)--it's high in fiber, low in calories and is very, very filling. Oh, and did I mention it's delicious? Of course, you can easily discount any sort of nutritional value when you order it in a restaurant--the breading and oil used to fry it adds a ton of calories and fat...things most of us generally tend to frown upon. A few years ago, I set it upon myself to try to "healthify" this dish, and I actually found it to be quite a task. 


First, I began breading the eggplant and baking it...the dish had a wonderful crunch but was also a total mess to make. I always wound up with egg, flour and breadcrumbs all over my fingers, and the process seemed to take forever. Then, I had a brilliant idea--why not get rid of the breadcrumbs altogether? Not only does it result in the elimination of a ton of unnecessary calories, but you also really get to taste the eggplant, not the overpowering flavor of the breadcrumbs. Oh, and by the way--it's super easy to make...any idiot could do it (seriously). So, without further adieu, here's my recipe for broiled eggplant parm:


Broiled Eggplant Parmesan
- 2 medium-sized eggplants
- Olive Oil Spray (I use my Misto) or a small amount of olive oil
- Salt
- Pepper
- Fresh Basil Leaves
- Parmesan Cheese
- 4-6oz sliced fresh mozzarella
- 1-2C Marinara Sauce (preferably homemade)

  1. Preheat the oven and place it on "Broil"
  2. Cut each eggplant lengthwise into roughly 1/4" pieces
  3. Line a couple of cookie trays with aluminum foil and place the eggplant on them
  4. Spray (or brush) the olive oil onto each side of the eggplant slices, and sprinkle with salt and pepper
  5. Place into the oven. Broil each side for 6-7 minutes, or until the eggplant begins to brown (see picture at the bottom) 
  6. Once the eggplant is done, set it aside and turn the oven down to 350 
  7. Get out a small, glass dish (I usually use one that's 8x8) and line the bottom of the pan with a few spoonfuls of marinara sauce mixed with water...it'll help to avoid any burning
  8. Before we go on, I should note that if you do not have any homemade marinara sauce, I strongly recommend Newman's Own Marinara...I've used a bunch of jarred sauces and have found this one to be the best...by far.
  9. Begin layering the eggplant by placing one layer of it, followed by marinara sauce and a dusting of parmesan cheese, and then another layer of eggplant. Keep repeating this until you run out of eggplant.
  10. Once you run out of eggplant, line the top with fresh basil leaves. Spoon the marinara over the top of that and then finally--place the sliced fresh mozzarella on top
  11. Bake for roughly 30 minutes or until the cheese is bubbly and golden brown. 
  12. Serve with a small side of pasta (I like mine with garlic and olive oil) and a salad
I'll take that eggplant broiled, never fried! Mmmm...healthiness. 


Saturday, February 19, 2011

Jew Food 101: Challah


Bread. There are so, so many different kinds throughout the world! The French have baguettes, the British have biscuits, Indians have naan, Christians have crackers (or "wafers," right?) the Russians have black bread and the Italians have ciabatta (and a billion others). My point is this--bread is a staple food of every culture throughout the world.

Now, I'm sure you're all thinking I'm about to talk about Matzot, our unleavened bread that's mostly eaten at Passover. Well, listen up goys, I've got some news for you--Passover only lasts a week, not an entire year. Our most well-known bread would have to be challah, a sweet, braided egg bread usually made every Friday night/Saturday for Shabbat. Braiding it can be a bit difficult, but if made correctly, it's delicious. It's also not unusual to see challah with raisins or chocolate chips. They're both great, but I always stick with the original!

Now, breaking bread is usually one of the first things that follows a service, but happens prior to dinner. The Kiddush, or blessing over the wine is first, and it's then followed by the Ha-motzi, or the blessing over the bread. Here's the Hebrew for it:

Hebrew
Hebrew

Now, I have no idea what that means, but I can read and pronounce every word! Remember it's read from right to left, because we Jews are super-awesome when it comes to archaic languages. What does it mean for you? Well, it simply means that you'll never be as Jewey OR awesome as I am. Be sure to check out an audio version of the prayer at the end of this post! Anyways, here's my favorite recipe for challah--it's simple, easy and delicious:

Breach Machine Challah II (directly from AllRecipes)

Ingredients

  • - 1 cup warm water
  • - 1/2 cup white sugar
  • - 1 tablespoon honey
  • - 1/2 cup vegetable oil
  • - 2 1/2 teaspoons salt
  • - 2 eggs, room temperature
  • - 4 cups bread flour
  • - 2 1/4 teaspoons bread machine yeast
  •  
  • - 1 egg, beaten
  • - 1 tablespoon water

Directions

  1. Place warm water, sugar, honey, vegetable oil, salt, 2 eggs, flour and yeast in the pan of the bread machine in the order recommended by the manufacturer. Select Dough cycle; press Start.
  2. After the machine is done, take the dough out, and place it on a very lightly floured board, punch the dough down, and let rest for 5 minutes.
  3. Divide the dough in half. Then divide into 3 equal pieces, roll into ropes about 12 to 14 inches, and braid into a loaf. Do the same with the remaining other half. Gently put the loaves on a greased cookie sheet, mist with water, cover loosely with plastic wrap, and let rise for 1 to 1 1/2 hours in a warm, draft free place, until double in size.
  4. Preheat oven to 350 degrees F (175 degrees C). In a small bowl, beat together 1 egg and 1 tablespoon water.
  5. Brush risen loaves with egg mixture. Bake in preheated oven for about 20 to 25 minutes. If it begins to brown too soon, cover with foil.


OMG! It's some Jew reciting the Ha-motzi!

Monday, February 7, 2011

Super Food for One Awesome Super Bowl!


Any given year, one sporting event captivates American households far more than any other showing--the Super Bowl. And hell, it's an awful lot more significant when one of your teams is playing in it. To take that even further--it becomes the ultimate occurrence when the team you happen to root for wins. And so, before anything else, let me simply exclaim: 

GREEN BAY PACKERS, SUPER BOWL XLV CHAMPIONS. GO PACK GO! 

Alright, now that we've got that out of the way, let's talk food. This year, we had a nice smorgasbord of food--green and yellow (get it?) fruit, brownies, chili and a few appetizers. I was responsible for the chili and, what was surprisingly the most popular appetizers--roasted garlic with pita bread. The chili was a very hearty, healthy dish loaded with flavor, spice and really fresh ingredients, while the garlic was essentially a really light side dish that could be spread on the pita. So, let's throw out some recipes:

Roasted Garlic w/ Pita

- 2 bulbs of garlic
- 2 tsp. olive oil
- whole wheat pitas
  1. Preheat the oven to 400° F
  2. Cut off the top of each bulb so the cloves are exposed and put 1tsp of olive oil on top of each. Let it soak in for 2 minutes
  3. Line a small, glass dish with tin foil.
  4. Place the bulbs in the dish/sheet and cover it with foil
  5. Place in the oven for 35-40 minutes, or until the garlic is slightly browned and some of the cloves are popping out
  6. Grab a knife, pry out one of the cloves, spread it on the pita and enjoy!


Heart-Healthy Turkey Chili

- 1-2lbs ground turkey
- 1 large onion, chopped
- 4-6 cloves garlic, minced
- 1t Cumin
- 3T Chili Powder
- 1 green bell pepper
- 1-2 jalapeƱo peppers (adjust on level of spiciness) 
- ½t pepper 
- 1t salt
- 1 28oz can crushed tomatoes
- 2t Worcestershire sauce
- 1 Can Black beans (drained)
- 1 Can Kidney beans (drained)
- 8oz frozen corn
  1. Mash together the meat, onions and garlic in a pot and cook on medium-high until cooked through.
  2. Add in the spices, peppers and a little over half the can of crushed tomatoes. Simmer for one hour.
  3. After the hour is up, add in the beans and corn. Heat through for fifteen minutes.
  4. Serve with sour cream and the sharpest cheddar cheese you can find (I love Cabot's Private Stock)


Wednesday, February 2, 2011

Easy Apps - Bruschetta


Ever go to a potluck dinner and have no idea what to bring? Well, look no further--bruschetta is one of those always-impressive yet surprisingly easy appetizers to make. When made correctly, it will always stand out as one of the most vibrant--and delicious--appetizers at any party. The key to making a great bruschetta is using really, really fresh ingredients - nothing canned and definitely no dried herbs.

Whenever I make bruschetta the amount of each ingredient always tends to fluctuate, so most of what you're putting in is going to be until it's to your liking. However, here's a sort of basic recipe/guideline to follow the next time you want to bring a stand-out dish to a party that requires hardly any effort!

Basic Bruschetta

- 1 pint (16oz) grape tomatoes
- 3 cloves garlic
- 2 T Olive Oil (more if needed)
- Large handful of basil leaves (more if desired)
- 1 Baguette
  1. Finely chop the garlic and basil, set aside
  2. Chop the tomatoes and place into a large bowl
  3. Mix in the olive oil and herbs
  4. Chill the mixture until ready to serve
  5. Cut the baguette into 1/4-inch slices, toast, and place a large spoonful of bruschetta on each piece. Enjoy!

Sunday, January 30, 2011

Winter Warmer


I had been dying to try my new immersion blender and, with the forecast looking like snow, thought a nice, warm soup would be the perfect dish to combat the icy weather. I've always been a curry fiend, which probably explains why this is one of my favorite recipes! There's always been an odd misconception that curry is spicy, although this idea is, well, wrong. When you go to an Indian restaurant, most of the dishes labeled as "curry" are spicy mainly because of the 'chilli' powder that they use. You can purchase hot curry, but most of them are pretty mild.

Anyways, back to the dish--Curry Carrot soup. It's really, really easy to make (only 8 ingredients!) and, while it may not look like much, it's loaded with flavor! The soup goes great with a salad and crusty wheat bread. For drink, I paired it with Dark Horse Boffo, an excellent brown ale. The malty nuttiness of the beer was a great complement to the sweetness of the soup. Anyways, here's the recipe for those of you seeking something new and delicious:

Curry Carrot Soup


- 2 cups chopped onions

- 2 T olive oil
- 2 lbs. carrots chopped coarsely
- 4 cups low-salt fat-free chicken broth
- 1 T chopped fresh ginger
- 1 tsp. curry powder
- ¼ tsp. black pepper
- 1+ cups orange juice
- Sour cream


Instructions

1. Saute onions in olive oil until glazed and soft (
do not brown).
2. Add all other ingredients
EXCEPT juice; simmer until tender (about 20-25 minutes).
3. Cool slightly. Put in blender and puree.

4. Return to pot, stir in orange juice, and simmer until heated through.

5. Ladle into bowls and garnish with sour cream and more curry, if desired.

Saturday, January 29, 2011

T is for Tofu.

With this being the inaugural post of my blog, I thought I would attempt something especially challenging. I had never worked with tofu before, so I knew this was going to be a [CRAZY] kitchen adventure. And, to make things more difficult, I would be cooking the one cuisine I had never quite mastered--Asian cooking.

So, the challenge: Panko-crusted orange tofu. Tofu is one of those weird, weird foods--it doesn't really taste like anything, but takes on whatever flavors you cook it with. I bought a block of tofu at the store, pulled it out of the box, and patted it down to drain the excess moisture. Then, I prepared my breading station--flour, egg and panko. I cubed the tofu, rolled it in each mixture, and put it in the oven to bake.

While the tofu was baking, I set out to make the sauce--vinegar, sugar, OJ, soy sauce and a heaping spoonful of chili garlic paste for that extra kick. I threw the ingredients in a pan, turned up the heat, and let the sauce simmer, with the hope that it would begin to thicken.

My gamble paid off...I was totally thrilled to see the bubbling in the pan! With the sauce quickly getting thicker and turning into somewhat of a glaze, and the tofu browning and getting crispy, I felt it was time to advance my plan to the next level. I pulled the tofu out of the oven and dumped it in the pan, stirring the mixture until everything was coated evenly.


Being the somewhat healthy lunatic that I am, I served it over brown rice. The end result? Success! The tofu was cooked well and had really taken on the flavor of the sauce, which had a nice sweet, orange taste with a strong, spicy kick. I refuse to say I've mastered Asian cooking, but this is certainly a huge step in the right direction. Onward!